UPAA Blog 2021-22 #21 - 6/16/22 (photos and text by Brooklynn Jarvis)
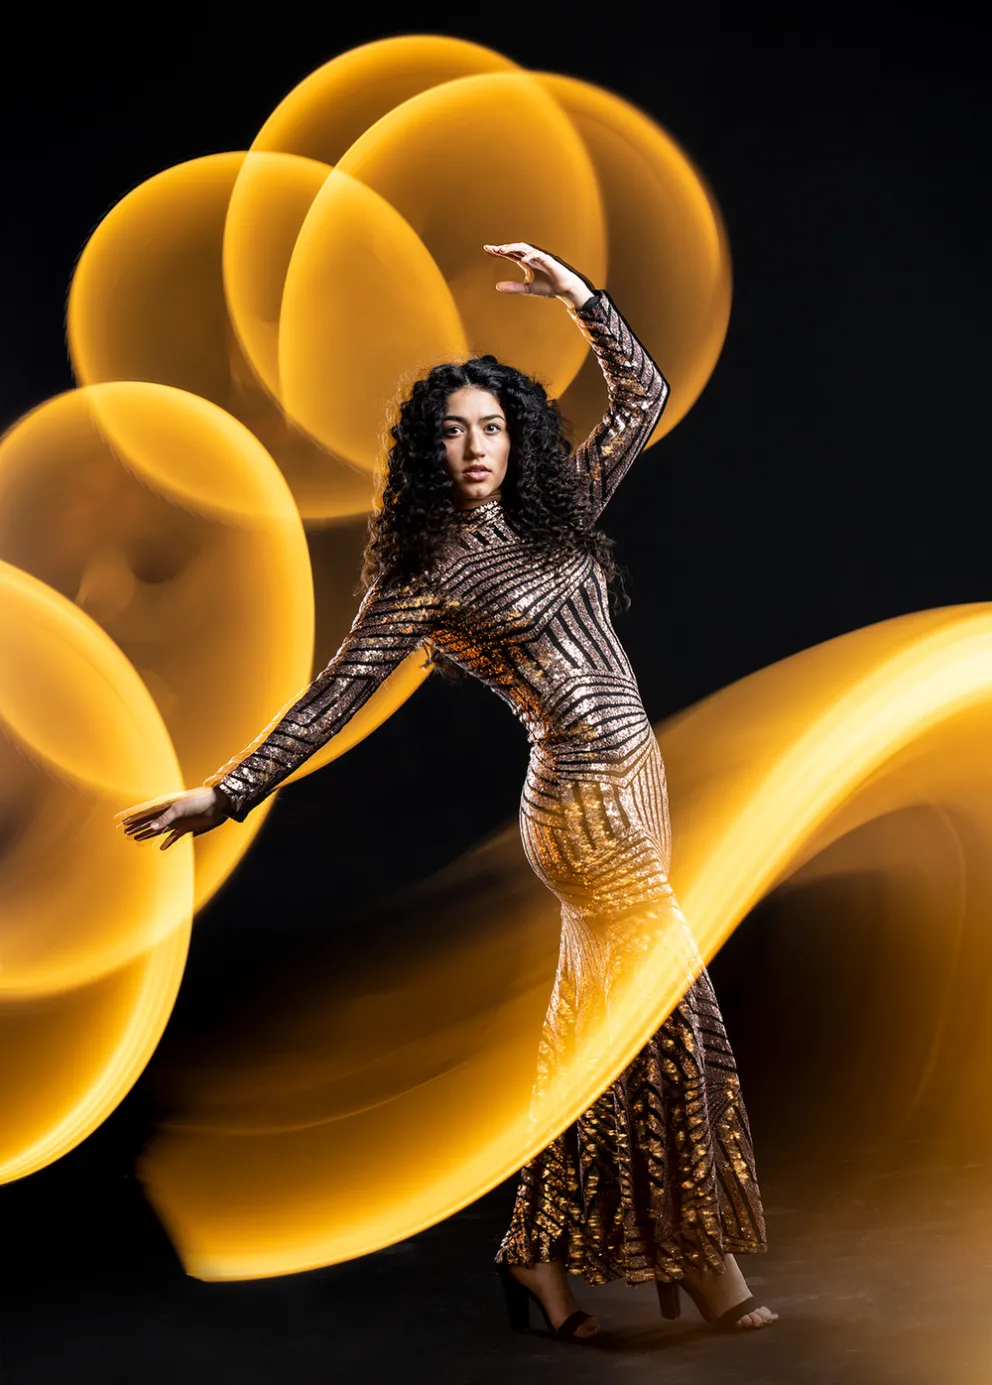
Brooklynn Jarvis is a student photographer at BYU Photo. Her Student and Associate category photo "Light Painting" won 1st place in the category in the May 2022 Monthly Image Competition.
************
1.Quick tech stuff—camera model, focal length, exposure data, lighting used (if any):
•Canon R5 on a tripod
•70-200 @ 84mm
•Two Profoto 1x6’ strip boxes (with fabric grid inserts) for rim lights, 4x6’ RFi Profoto softbox for the key light and an Aputure MC LED light for the light painting
•5 seconds, f5.6, ISO 125
2. How did this shoot land on your calendar? Did you have a plan/vision prior to the shoot?
Before joining BYU Photo 7 months ago, I had no idea how to create an image in the studio that utilized both strobes and light painting - it was so far beyond my comprehension. Jaren Wilkey and Nate Edwards took time to mentor us all and teach us how to do this effect. Then they challenged us to practice on our own time and I decided to take what I learned and create something beautiful.
To find models, I will often stop people on campus (or wherever I’m at) who I think are photogenic, and ask them if they would be interested in modeling. 100% of the time they say yes. That is how I found Ensley (who is in the UPAA featured shot). Turns out, Ensley already models on the side, so that made it really easy to work with her. *Pro tip: the best people I have worked with in (and outside) the studio have been part-time models. In most cities, there are facebook groups that have young models willing to trade their talent for free pictures/experience. As a poor college student, or anyone else, this is a great opportunity and a wonderful thing for a portfolio. Models are more comfortable in front of a camera than most people and they pose themselves in ways you would never have thought of before. This combination can produce stunning results.
In preparation for the shoot, I spent some time in the studio with my coworker Ellie practicing and seeing what kind of light painting I liked best. I found that my favorite styles were thick waves and circular swirls. To get the effect I wanted, I needed to set my exposure to a couple seconds and then have the strobe go off on the front curtain, freezing her image. Once the strobe went off, I would run behind Ellie and swing my light around her to create designs behind her. It is crucial to have a completely dark studio when doing this, because ambient light will ruin the image. Here are some examples of my practice shoot with her:
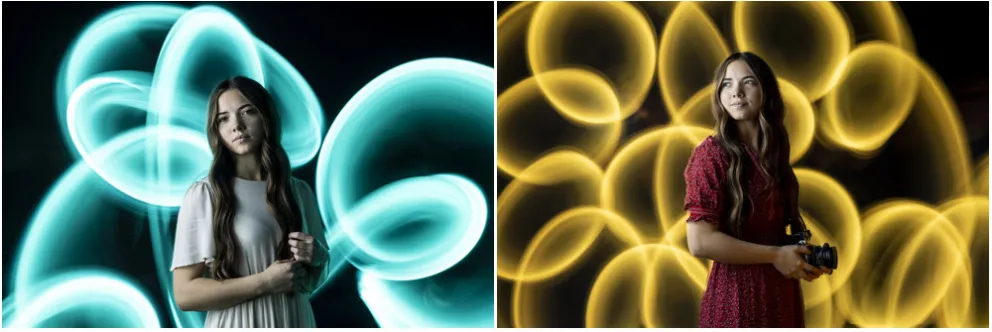
To make the lines of light, I used an Aputure MC LED light. Something that I love about these lights is that the choice of color/hue is virtually endless. They also provide an option to change saturation and intensity of the color picked as well. This makes it so that the light is perfectly customizable to fit the needs of the photographer.
In order to get the thicker, dreamier lines I wanted, I used a medium-sized, clear white garbage bag. It is really easy to swing around and it creates beautiful, diffused lines. The swinging motion is what produces the continuous, curvy lines. You can also use tinfoil or anything that is reflective to hold the little Aputure light, which is what Jaren and Nate use a lot when photographing portraits. To get the effect to work, I placed the Aputure light in the bag face-up and blew air into the bag. This way, the light illuminated the whole bag which made the lines appear thick in my pictures. Here are the materials I used:
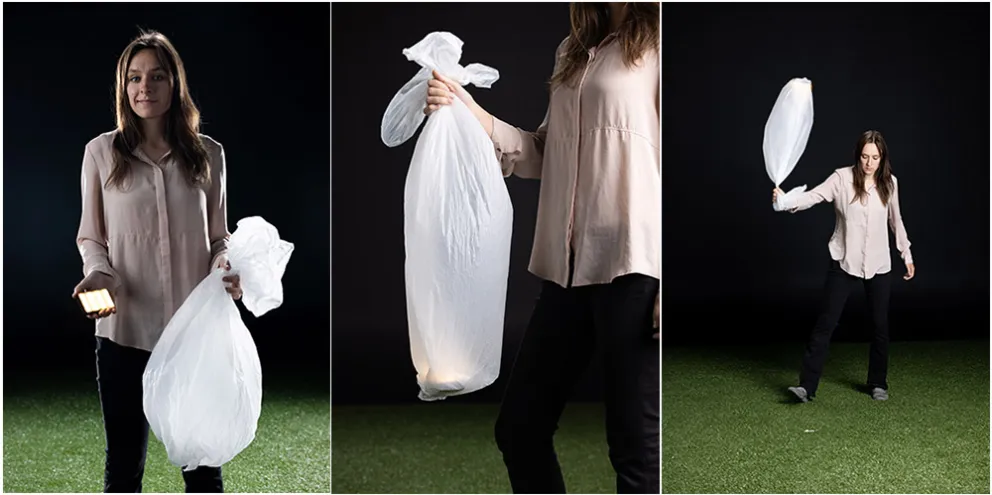
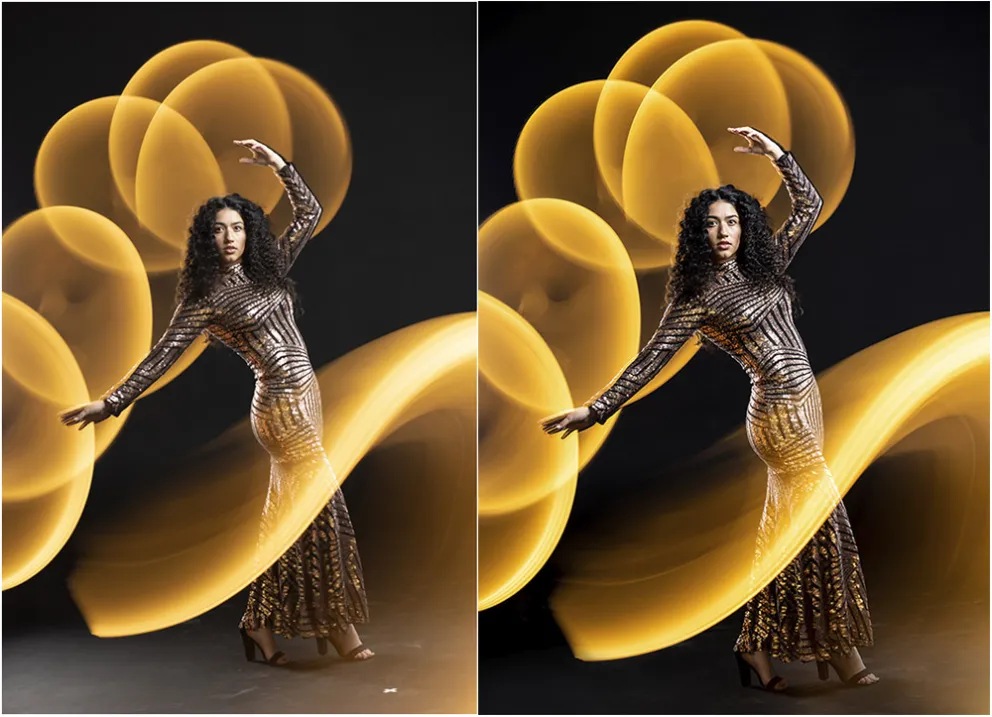
To make the swirling light, I needed to swing the garbage bag around behind the model after the strobe went off, as seen in the right image.
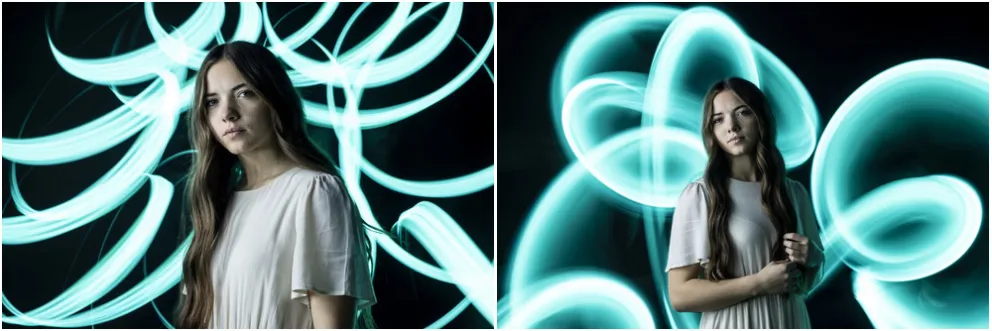
I found that if I didn’t put the light face-up in the bag, the lines I drew looked a lot thinner and more aggressive, as seen in the left image, versus the broader paths on the right.
3. Any unique logistics in making the photo? What sort of post processing (or not)?
Finally the day of the shoot with Ensley came. I was really excited and also super nervous because I was working with a stranger and was still a little insecure in the studio. I told my model to bring multiple changes of clothes that I could pick from and she surprised me with the dress in the final image.
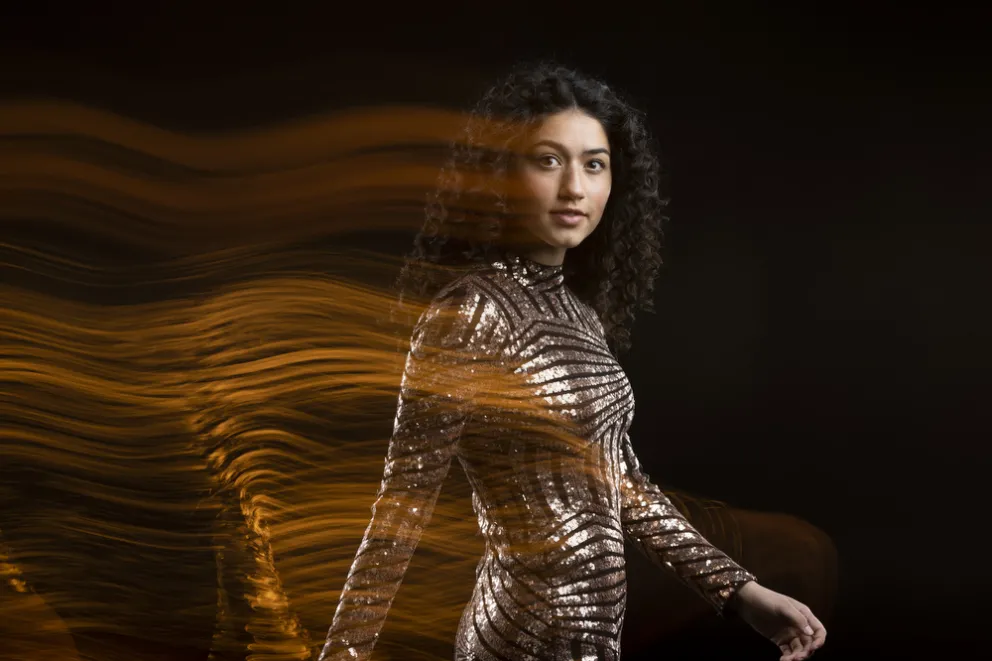
We first experimented with motion-drag, as seen below in the first image, and then we moved on to the light painting technique that I had practiced with Ellie. The light trails from this image below are created from the bright ambient light shining from our office into the studio. The little sequin pieces on the dress are what make so many lines of light visible. This was shot on the rear curtain option.
With the light painting, it took multiple times before I could get a picture that looked intentional:
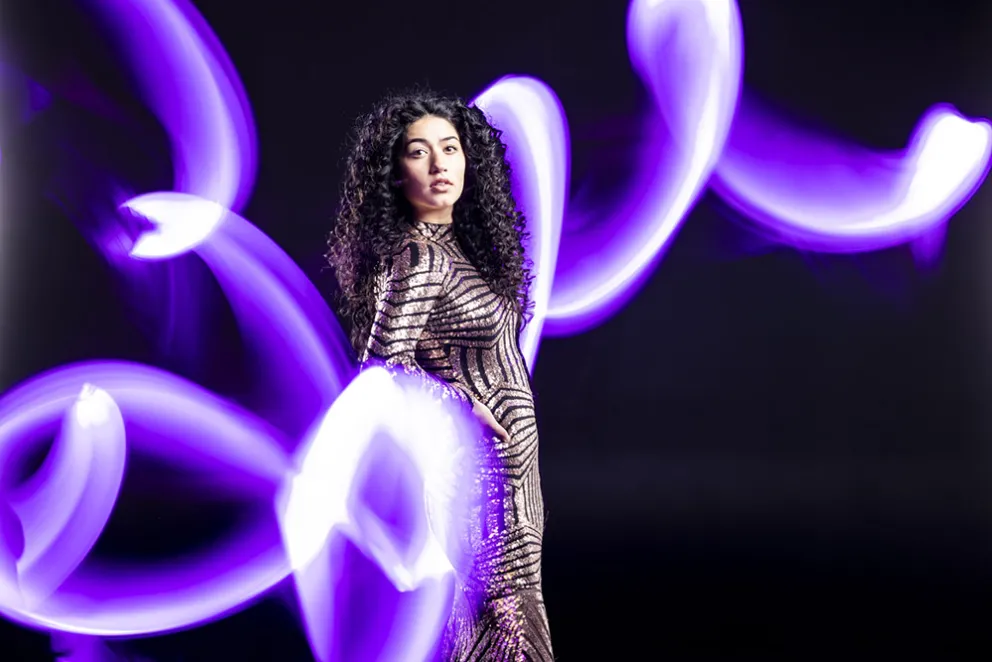
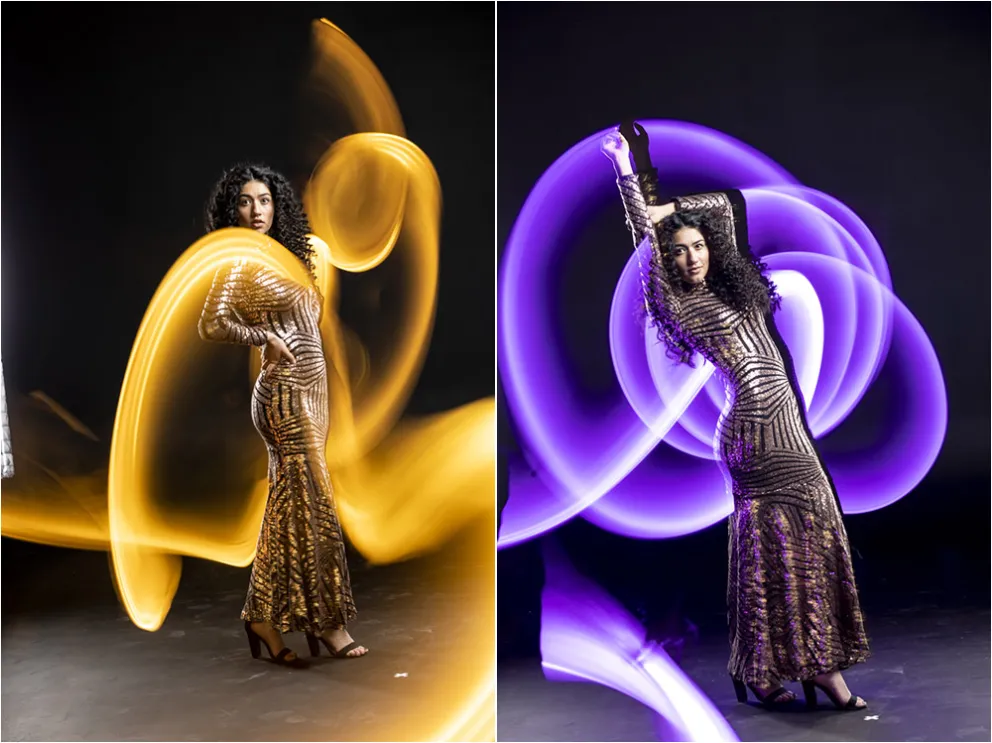
It is common to have ghosting (or the sharp black outline of a subject) in images that utilize a strobe and other light. This is caused by the model moving from their original position after the strobe goes off initially. The black silhouette of them is their body blocking the light that is drawn after with the Aputure light.
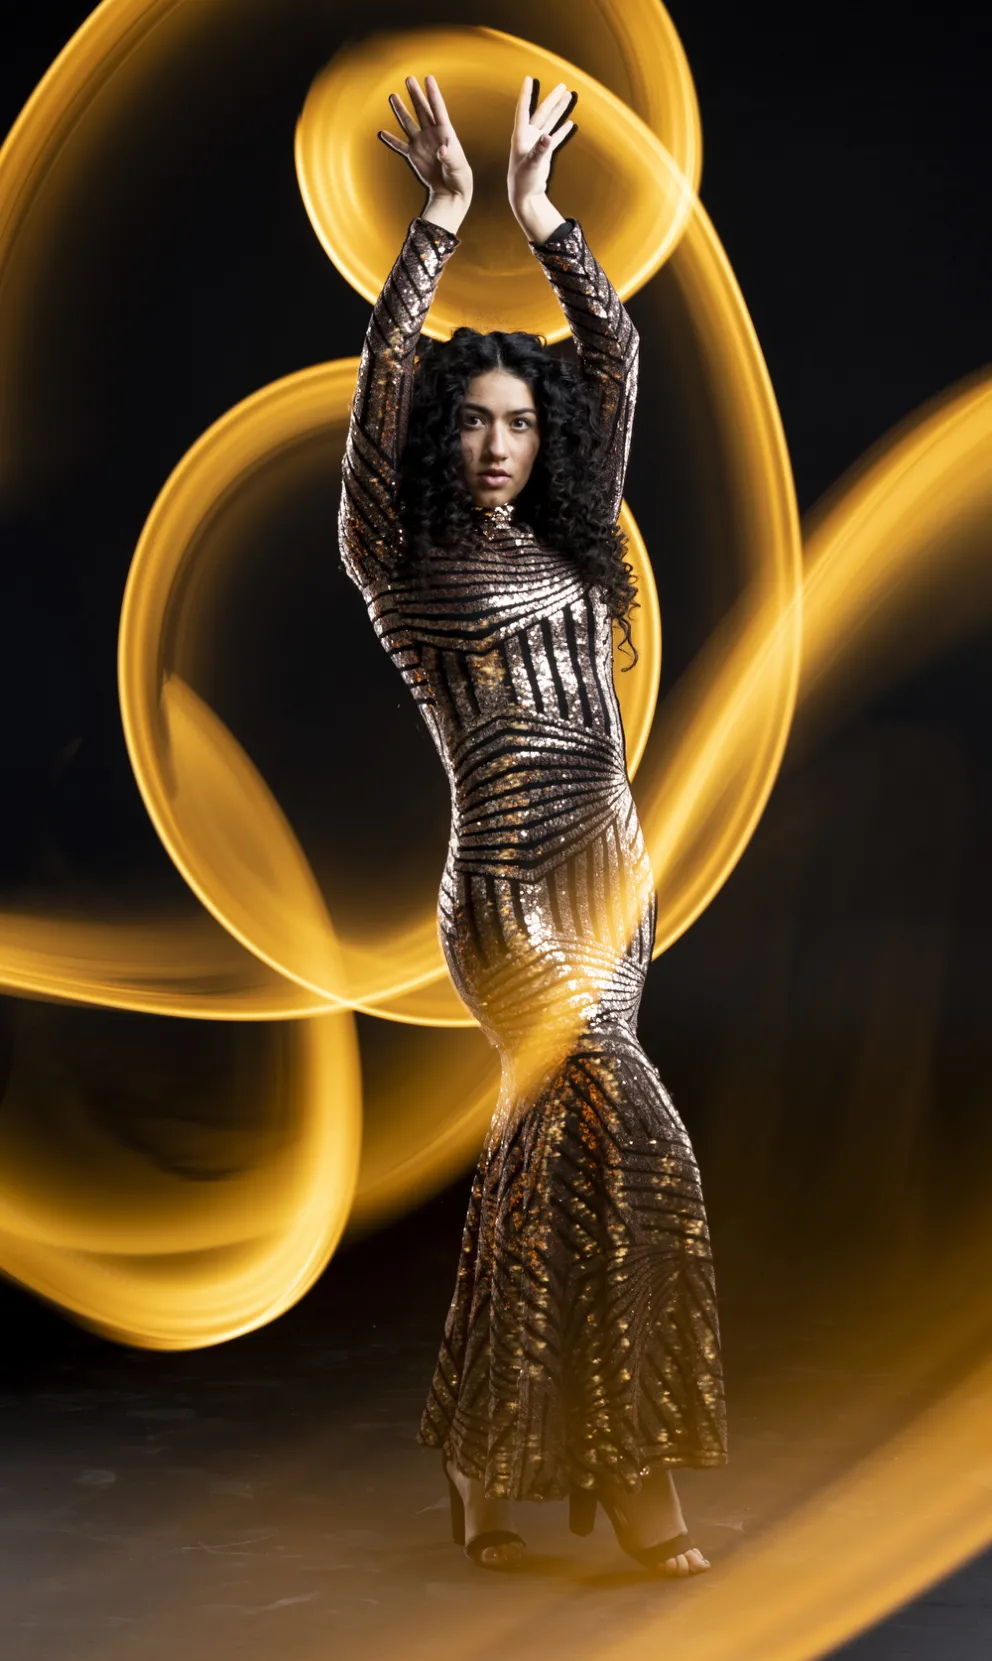
It is important to experiment with different colors. After a few shots of purple, I decided to try orange and we both felt like it was the perfect color to use. It accentuated Ensley’s dress and her personality. I also found that if I followed her form better with the light, the pictures turned out more visually appealing and intentional.
4. Did your vision before you made the photo come through in the final product? What (if anything) would you do differently if you could re-shoot this today?
The biggest change that I made between the RAW file of Light Painting and the final edit was darkening the floor. In the original image, the floor is a big distraction. That is why, if I were to shoot this image again, I would put my camera on the floor to minimize that factor, instead of putting it on a tall tripod.
I shot using the front curtain option and used a two second timer so that I could have more time to get ready to run in and paint. I was wearing all black so that when I ran in front of the camera with my Aputure light in a bag, the camera wouldn’t pick up my figure running around. This is crucial for light painting, otherwise you will most definitely show up in the picture, and that is really hard to edit out in post. Some people even use black ski masks because even your face can cause an unwanted trail of light. Another important thing to remember is to wait for the strobe to go off and then go in to start painting, otherwise you will be seen in the picture. If the strobe is on the rear curtain, it is imperative to get out of the shot before the exposure finishes, otherwise you will appear in the photo as well, frozen in time.
In the end, I learned that if I want to get better, I need to experiment, make mistakes, and practice.

Notice here how the subject is out of focus - this is because I had forgotten to turn off the office lights when I started light painting and so there was too much ambient light shining in on Ensley. In order to make a crisp picture with light painting, the studio must be pitch black. That way the strobe is the only light that gets shone onto the model, and it only shines once, freezing them in place.
5. What do you do to keep yourself motivated and interested in your work?
As a photography major, we learn many techniques to improve and we work constantly to find our personal style. I have been taught that a photographer’s best picture is always their next one. This inspires me to continuously push myself and try shooting things I never have before; hence experimenting with shutter drag.
I am still an amateur in the studio, but this shoot taught me that I can do hard things, overcome my insecurities and make something beautiful. Like my boss Nate always says: “there is no growth in the comfort zone and no comfort in the growth zone.” If we push ourselves to try things we aren’t used to, then we unlock the opportunity to discover our true, artistic potential.
************
"Did you hear about the big LEGO sale? People were lined up for blocks!" Thanks for reading the blog. Stories, suggestions, and jokes are always welcome. Email editor Matt Cashore, mcashore@nd.edu. And, as always, if you haven't already, follow UPAA on Instagram!