UPAA Blog 2021-22 #17 - 4/21/22 (photos and text by Michel Caron)
For many photographers...of a certain age...the transition to digital meant wondering what to do with the boxes and drawers and folders of slides and negatives. Fortunately, if you're old enough to have this problem, you probably also have a box or two full of the parts required for a quick and convenient solution. Michel Caron of Université de Sherbrooke in Quebec details his setup and workflow. -Ed.
************
History
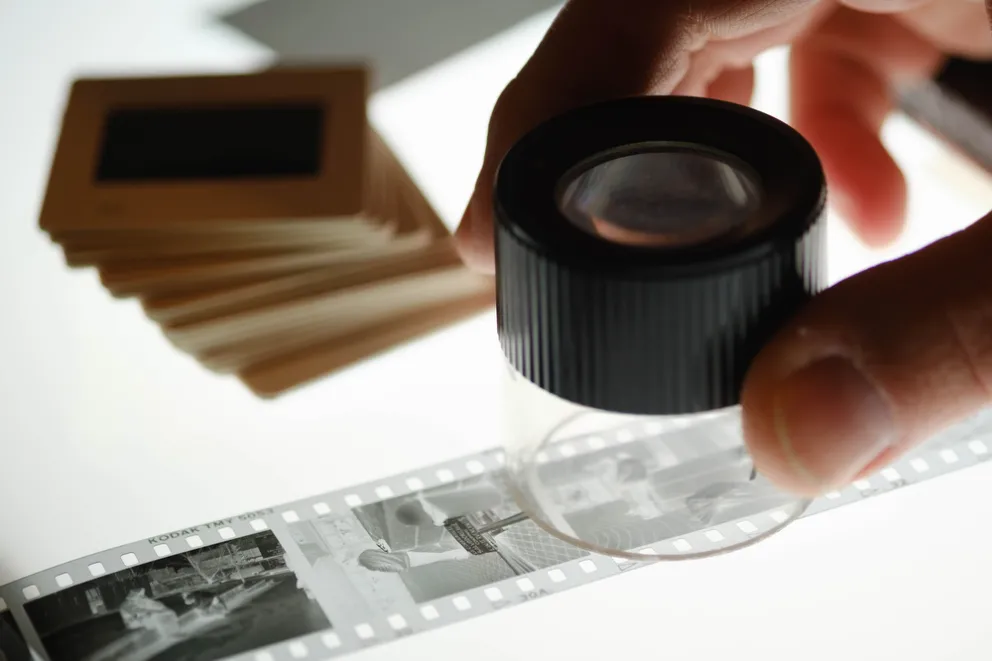
My film archive consisted of thousands of 35mm black & white negatives with a couple boxes of slides. I didn’t really bother for few years as I still had my darkroom and had a Canon film scanner (SCSI connection) that was adequate if needed.
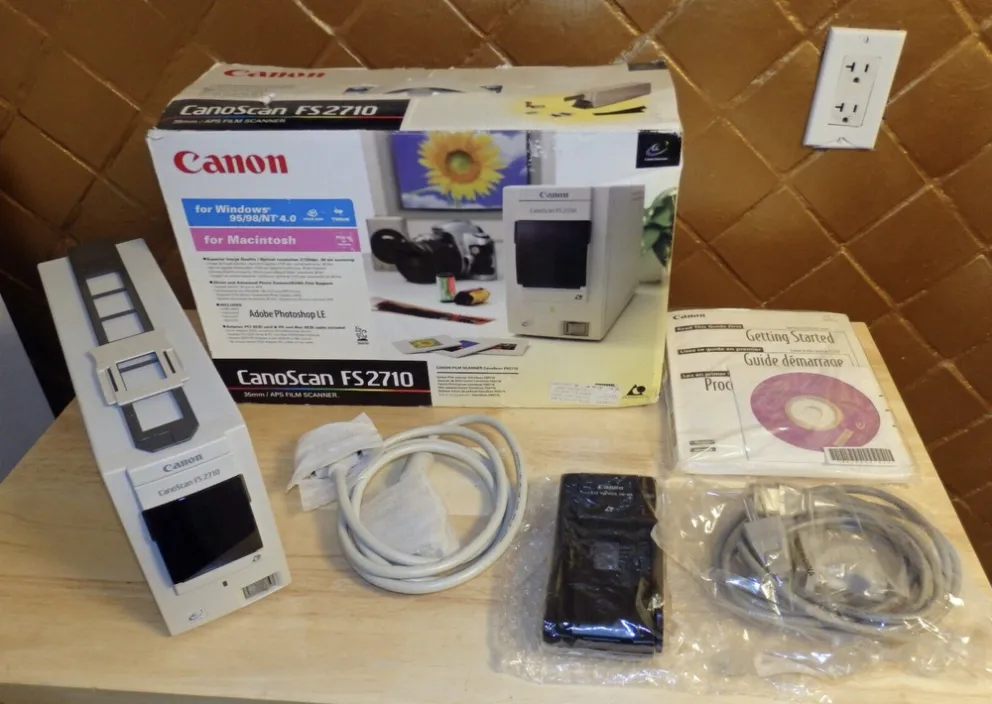
(eBay Photo) A CanoScan FS2710. Remember SCSI cables?
But after some years, the Canon scanner was no longer compatible with my computer and I just stopped re-visiting my analog archive.
A few years ago, I decided to do a photo exhibition of the first 18 years of my two sons. I've always photographed my daily life since I got my first camera.
Going through my negatives was fun but the scans from my local camera lab were unsatisfying. That’s when I began to search for a home scanner so I could do the job myself. I can’t remember exactly where, but I found a website where someone detailed using a DSLR for scanning and how unbelievably good the results were, even compared to hi-end scans. That was more than enough for me to give it a try.
After some failed attempts, I came up with a good setup and workflow that made it much faster than a scanner and the results are excellent. As a bonus, I can listen to music as the whole process is noiseless.
The set-up
I use a Fuji X-T4 with a Fuji 60mm 2.4 and a Fuji 16mm tube to get the 1:1 ratio. Exposure is selected by aperture priority mode @5.6 and base iso (100). If needed, I fine tune using exposure correction and the camera histogram but I've found that's rarely necessary in RAW capture.

Fuji X-H1 with Fuji 60mm 2.4 macro lens and 16 mm extension tube. Negative holder from an old Beseler enlarger.
I fixed the camera on an old enlarger column and bought a cheap macro rail for focusing.

I use the enlarger negative carrier for keeping the negative strip in place and flat. The carrier is simply placed on a foam board that is duct taped on the glass. I glued 4 bolts under the negative carrier and “imprinted it” on the foamboard. That way, each negative is exactly at the right place under the camera. The time it takes only depends on how fast I’m able to switch the negatives. If I scan a 6-photo strip, it takes less than 30 seconds even if I clean each negative with canned air.
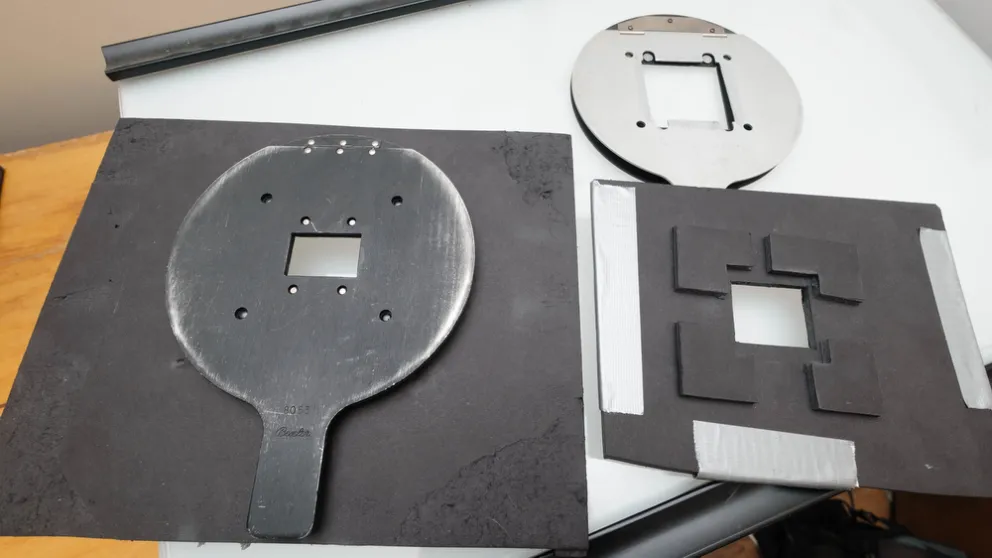
Holder for 35mm negatives, holder for 2 ¼ negatives and homemade holder for 35mm slides.
For a light source, I use an old X-ray lightbox someone gave me long time ago. The lightbox uses fluorescents so if I shoot color slides, I shoot a blank first for setting the white balance. There are many smaller alternatives available on the web or you can even use an iPad.
This process is wonderfully quick. While a scan in hi-definition can take a couple minutes, here it’s more like a couple seconds!
Fine tuning the set-up
As I use an old light box, the surface isn’t perfect. I now use a half-inch foam spacer between the film and the light box. It renders the light box surface blurred so even if there are imperfections on it, they don’t show on the "scan."
As I use fluorescent light with the best camera settings for high quality, I ended up with vibration sensitive shutter speeds of between 1/30 to 1 sec. I started using a remote fixed on the wall, so I didn’t have to wait for a 2 sec timer. Now I mostly shoot tethered and use the shutter on the tethered shooting software.
For larger negatives, I bought a used 2 ¼ square Beseler negative carrier. Single shot at 26MP is excellent but I also tried taking multiple shots that I merged in Lightroom and the results are excellent and produce larger files if needed.

Original was 2 ¼ negative taken with a Yashica-Mat. I used 4 capture with the Fuji for a resulting file of 9000 x 9000 pixels.
For the slides, I made a two-layer foamboard holder that keep the slides at the right place but enable me to remove them easily.
Post-production
Each file contains all the information that was present in the negatives. When I only scan a couple negatives, I simply invert the curves in Lightroom so I get a positive. The drawback is in doing that, all the adjustments sliders are inverted too. It can be a bit confusing!
A much better way is by making a Photoshop action set that inverted the negatives. Batch processing can be made for bringing the whole session scans to positive versions.
Another option is to buy Negative Lab Pro, a Lightroom plug-in that helps manage the negatives and includes color correction and color fidelity tools. (I've never seen the need in my workflow as I don’t have color negatives.)
There is space to push much more in the technical aspects of this process. Info about high color index rendering lightpanels and other tricks can be found on the Negative Lab Pro Website
Revisiting my negatives isn't a problem anymore…Except that every time I dig in these, it reminds me that the digital era made me a much better organized photographer. My old negatives are in folders without date or keywords…
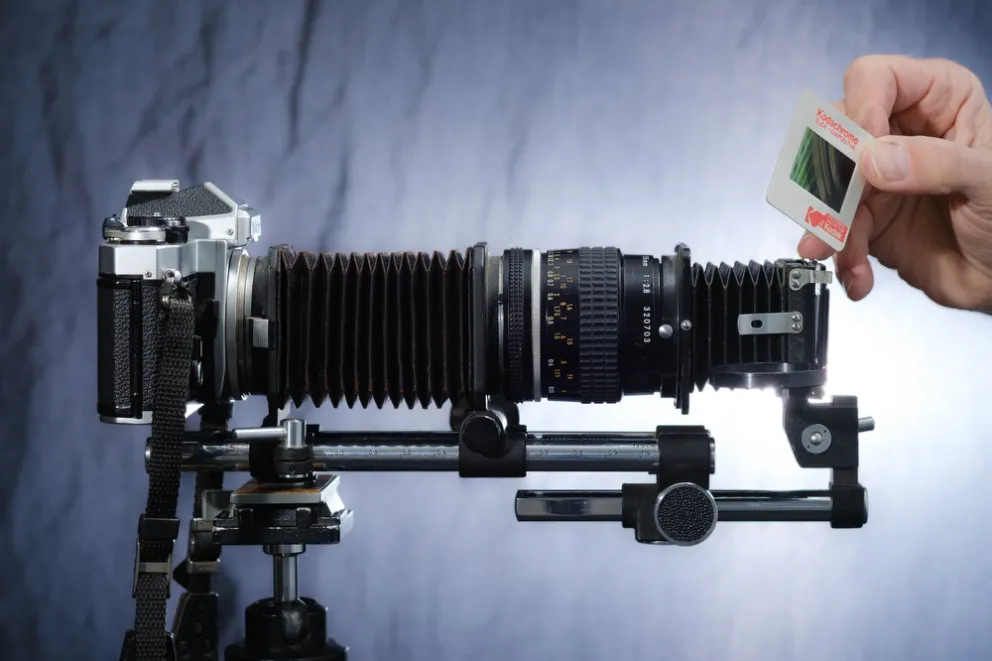
Nikon Model II bellows with copying kit. Used with a Nikon FE and Nikon 55mm 2.8 macro lens. Reproducing slides and negatives using a camera isn’t something new!
Sidebar
by Chuck Barry, former photographer at Santa Clara University
Since I’m no longer a full-time staffer, setting up an assembly line operation isn’t important to me.
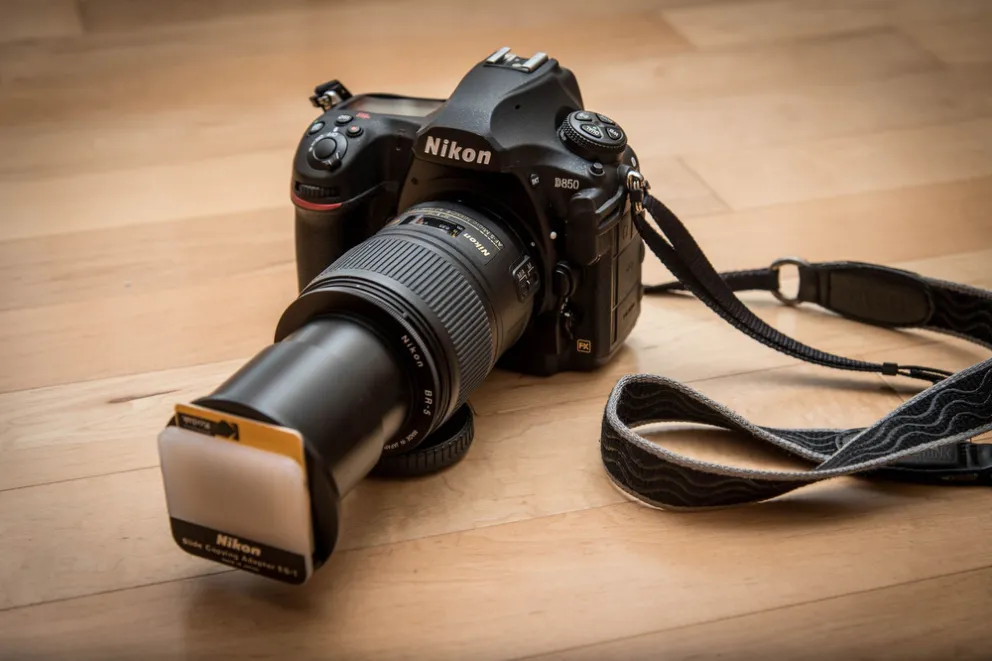
My system is more casual. I use a D-850 with a 60mm macro lens. I bought a Nikon ES-1 slide copying attachment and the necessary adapter rings to fit it to the lens. Thanks, Robert’s!
Since the camera and subject are firmly mounted to each other, I just hand hold it. I have a translucent white window shade in my living room, so I just point it at that and fire away. I use the first exposure without a slide in the mount to set the white balance.
I’ve only tried one negative, so I haven’t gotten around to making a proper neg holder yet.
I find the quality is much better than I get with my new Epson V600 Photo, although the Epson is better than I expected.
Before I went totally digital, I used a Nikon LS 1000 Coolscan and hated it! It didn’t focus properly, and seemed to enhance the grain and dust.
************
"Just so everybody's clear...I'm going to put my glasses on." Thanks for reading the UPAA blog. Article submissions are welcome and encouraged. Contact editor Matt Cashore, mcashore@nd.edu. Follow UPAA on Instagram.